RStudio projects and GitHub
December 20 2022
rstudio.RmdUse git in RStudio
Connect your GitHub repository to an RStudio project
This guide assumes you have a GitHub repository all set up. If you need help doing that, there’s another guide here that will take you through it.
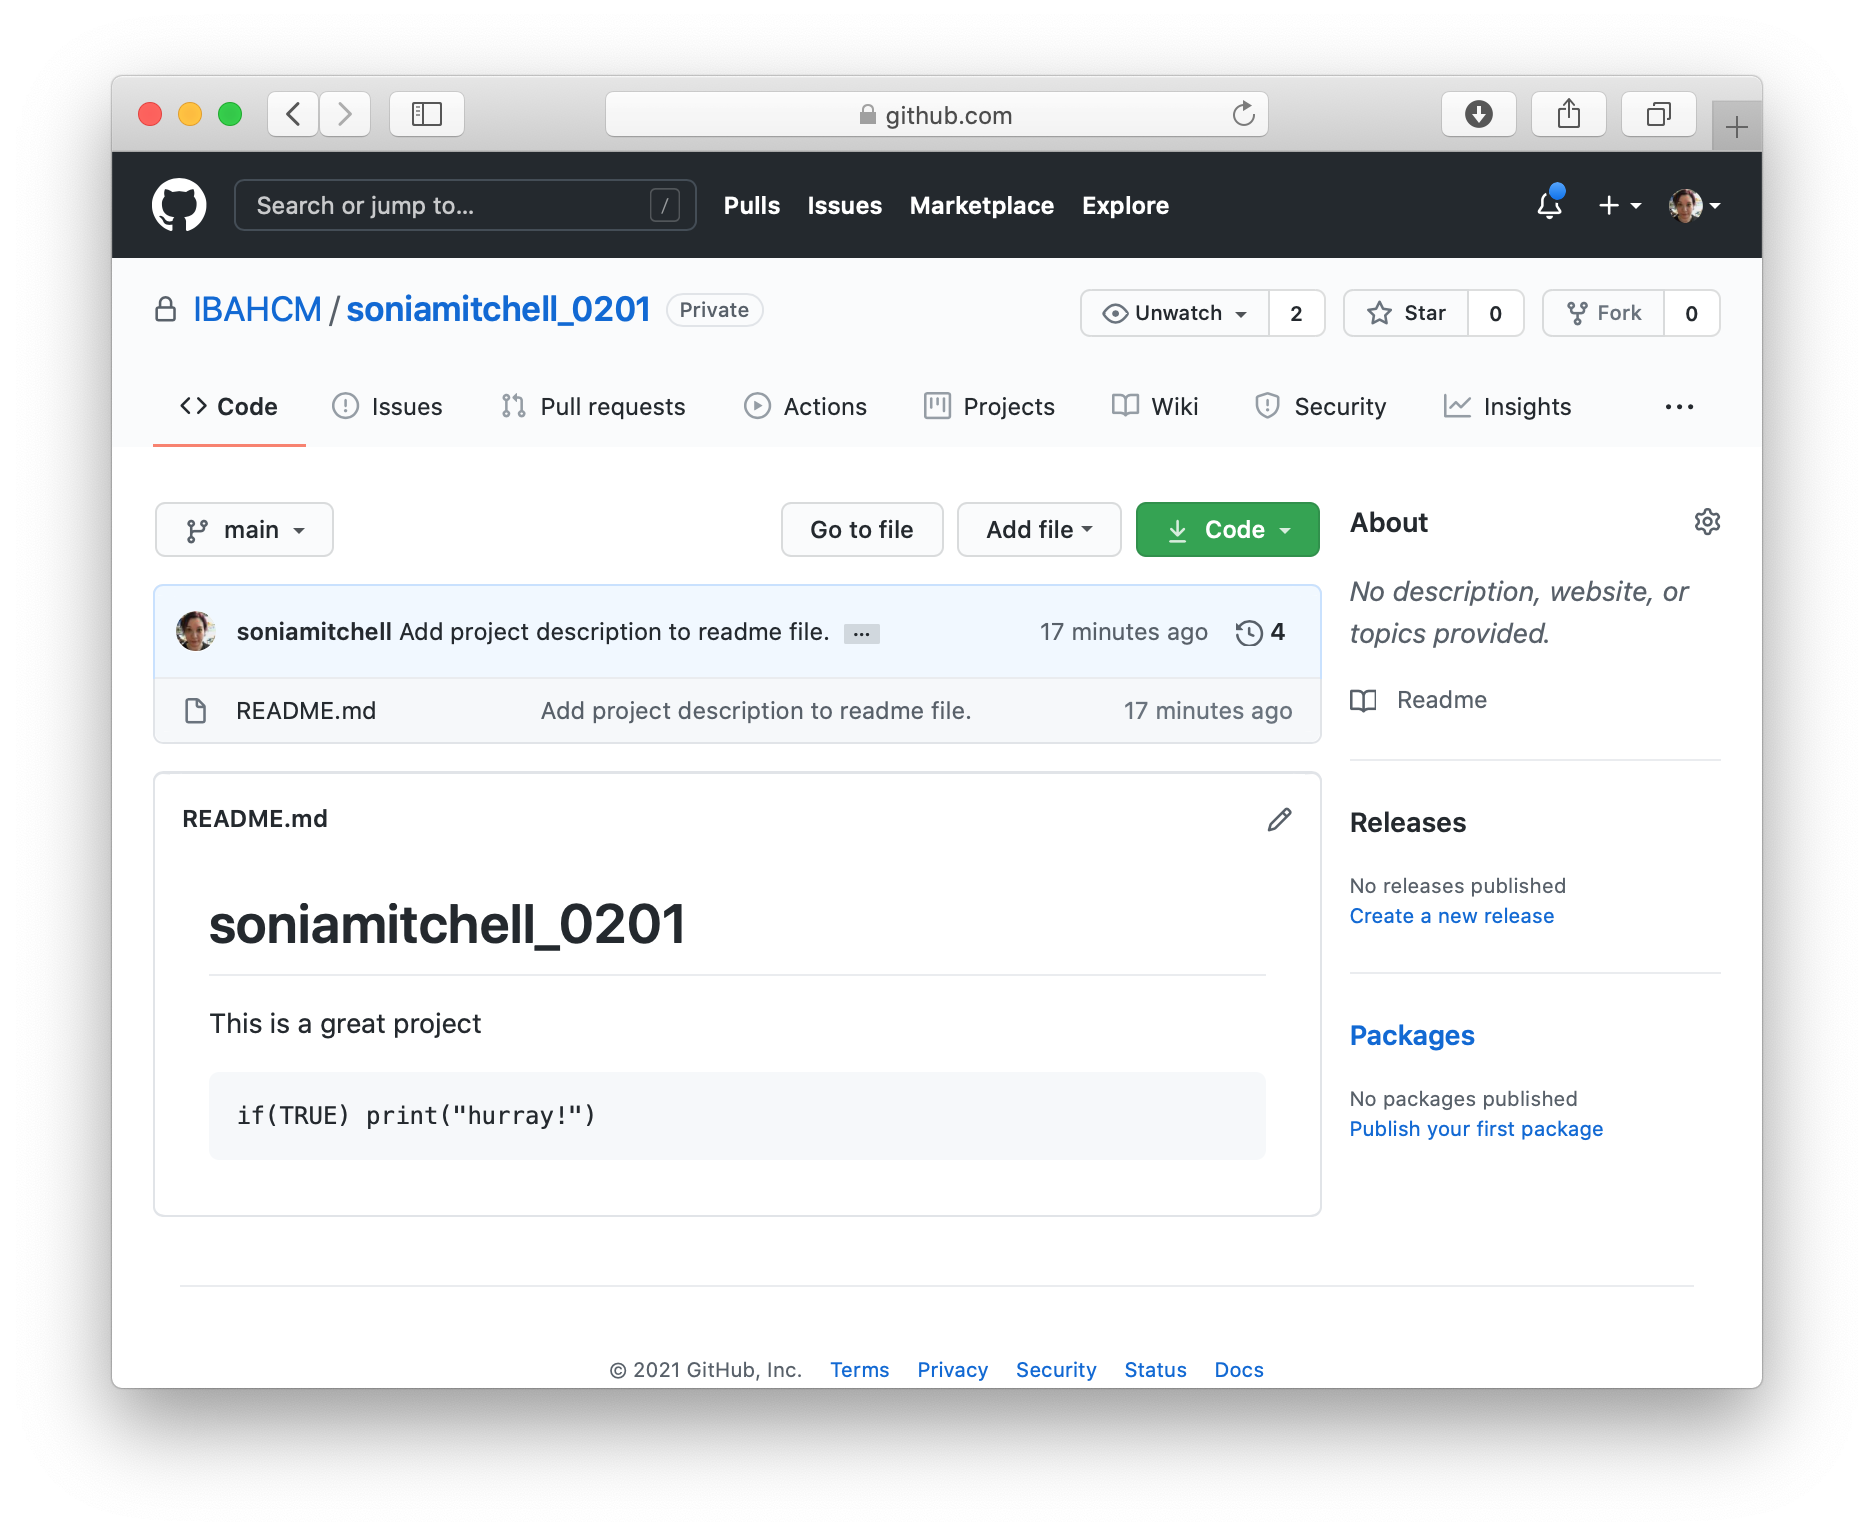
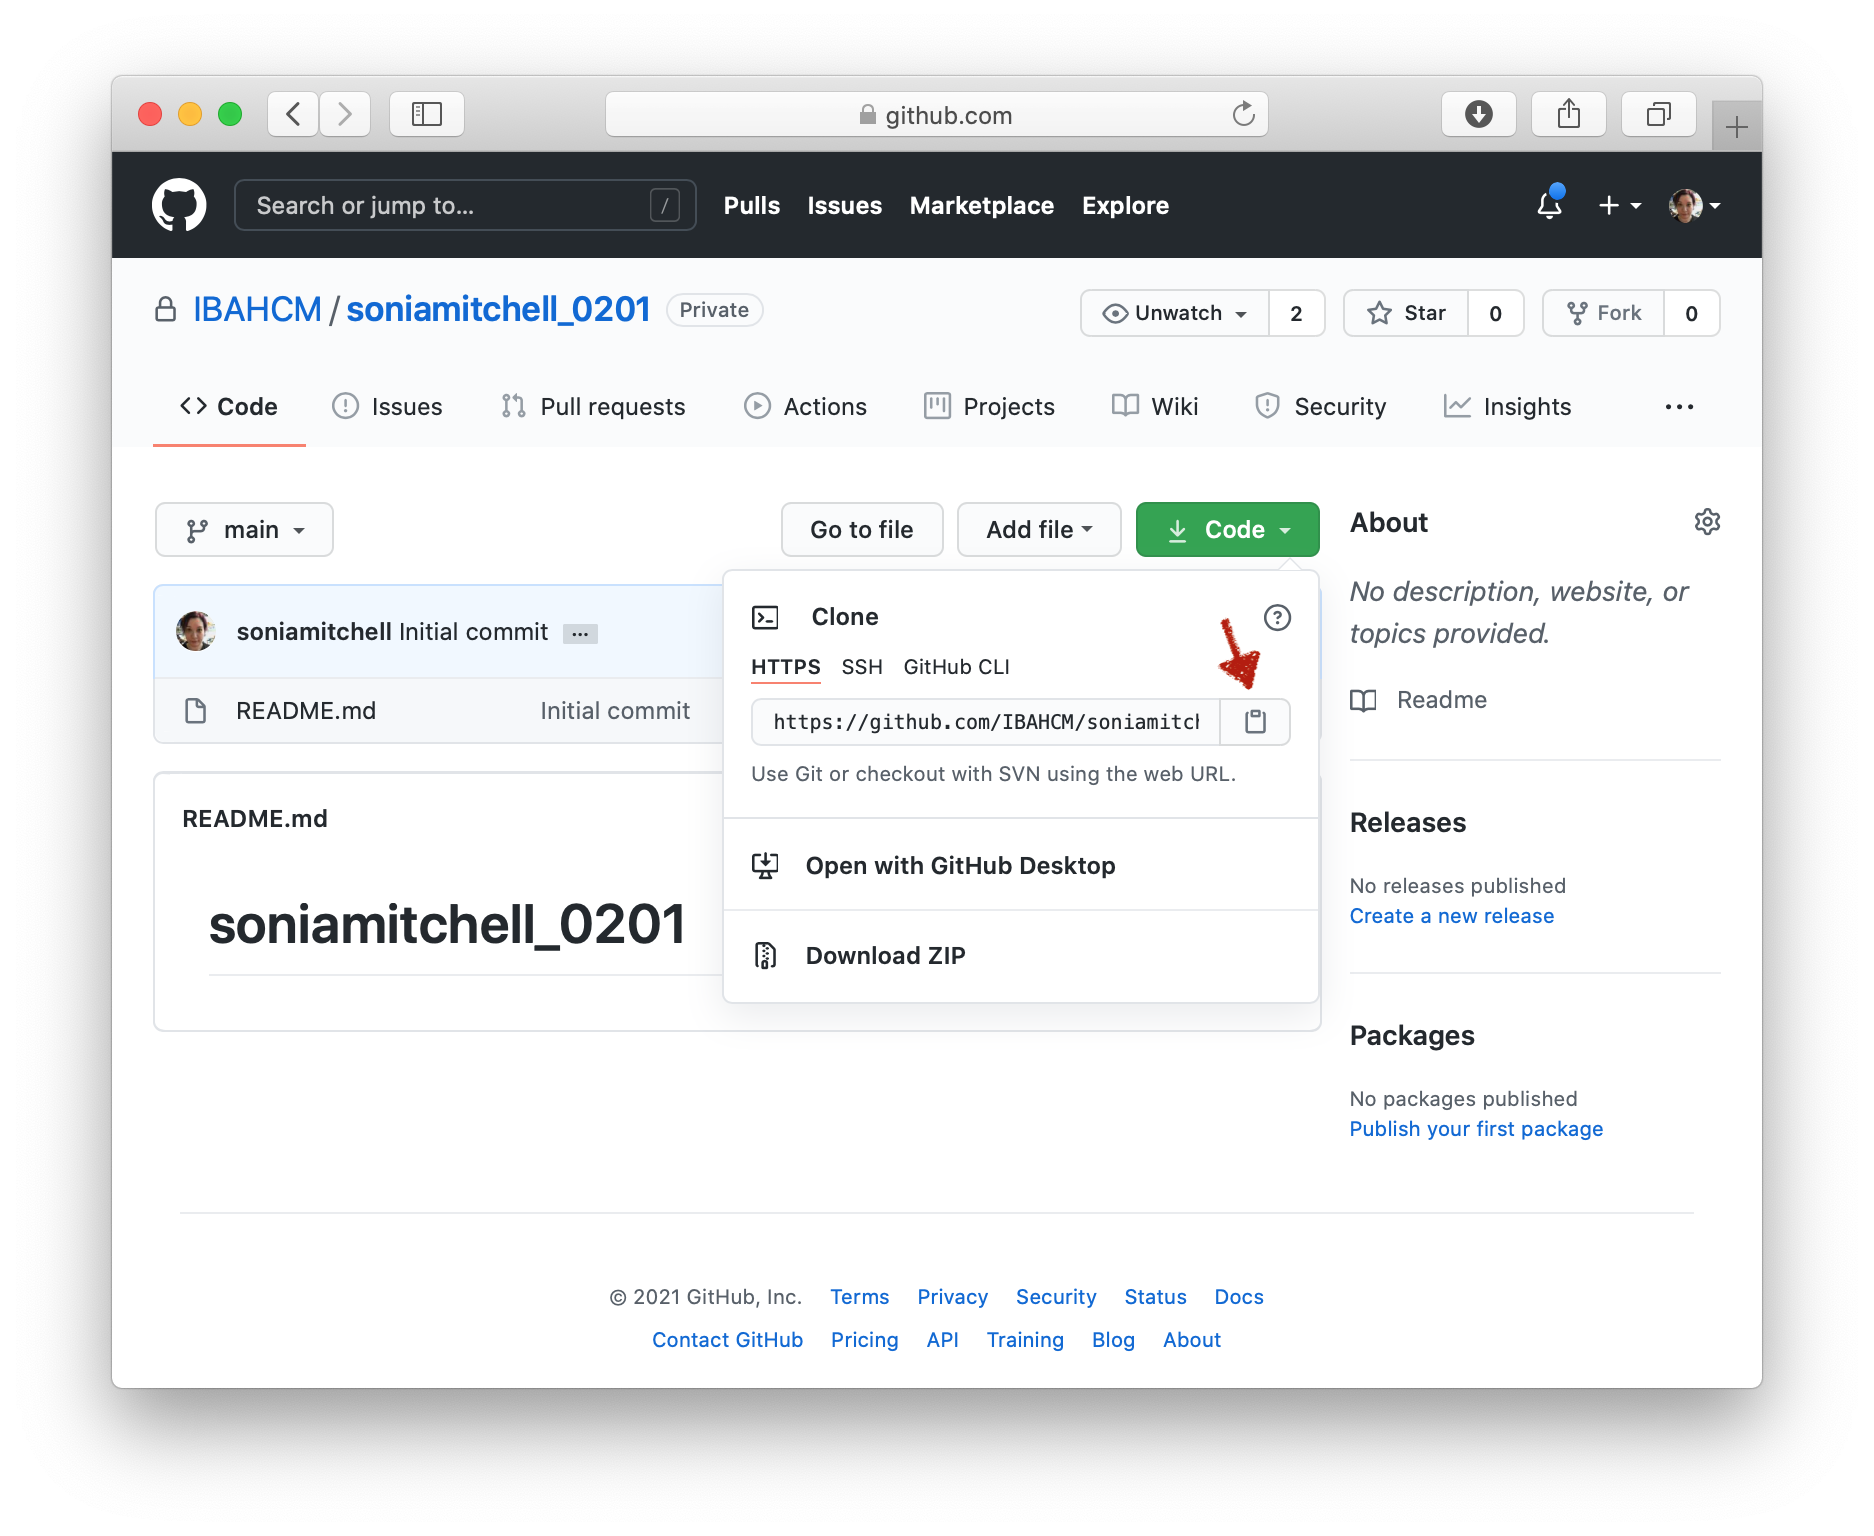
Once you’re all set up, click on the green Code button and copy the URL associated with your GitHub repository to your clipboard
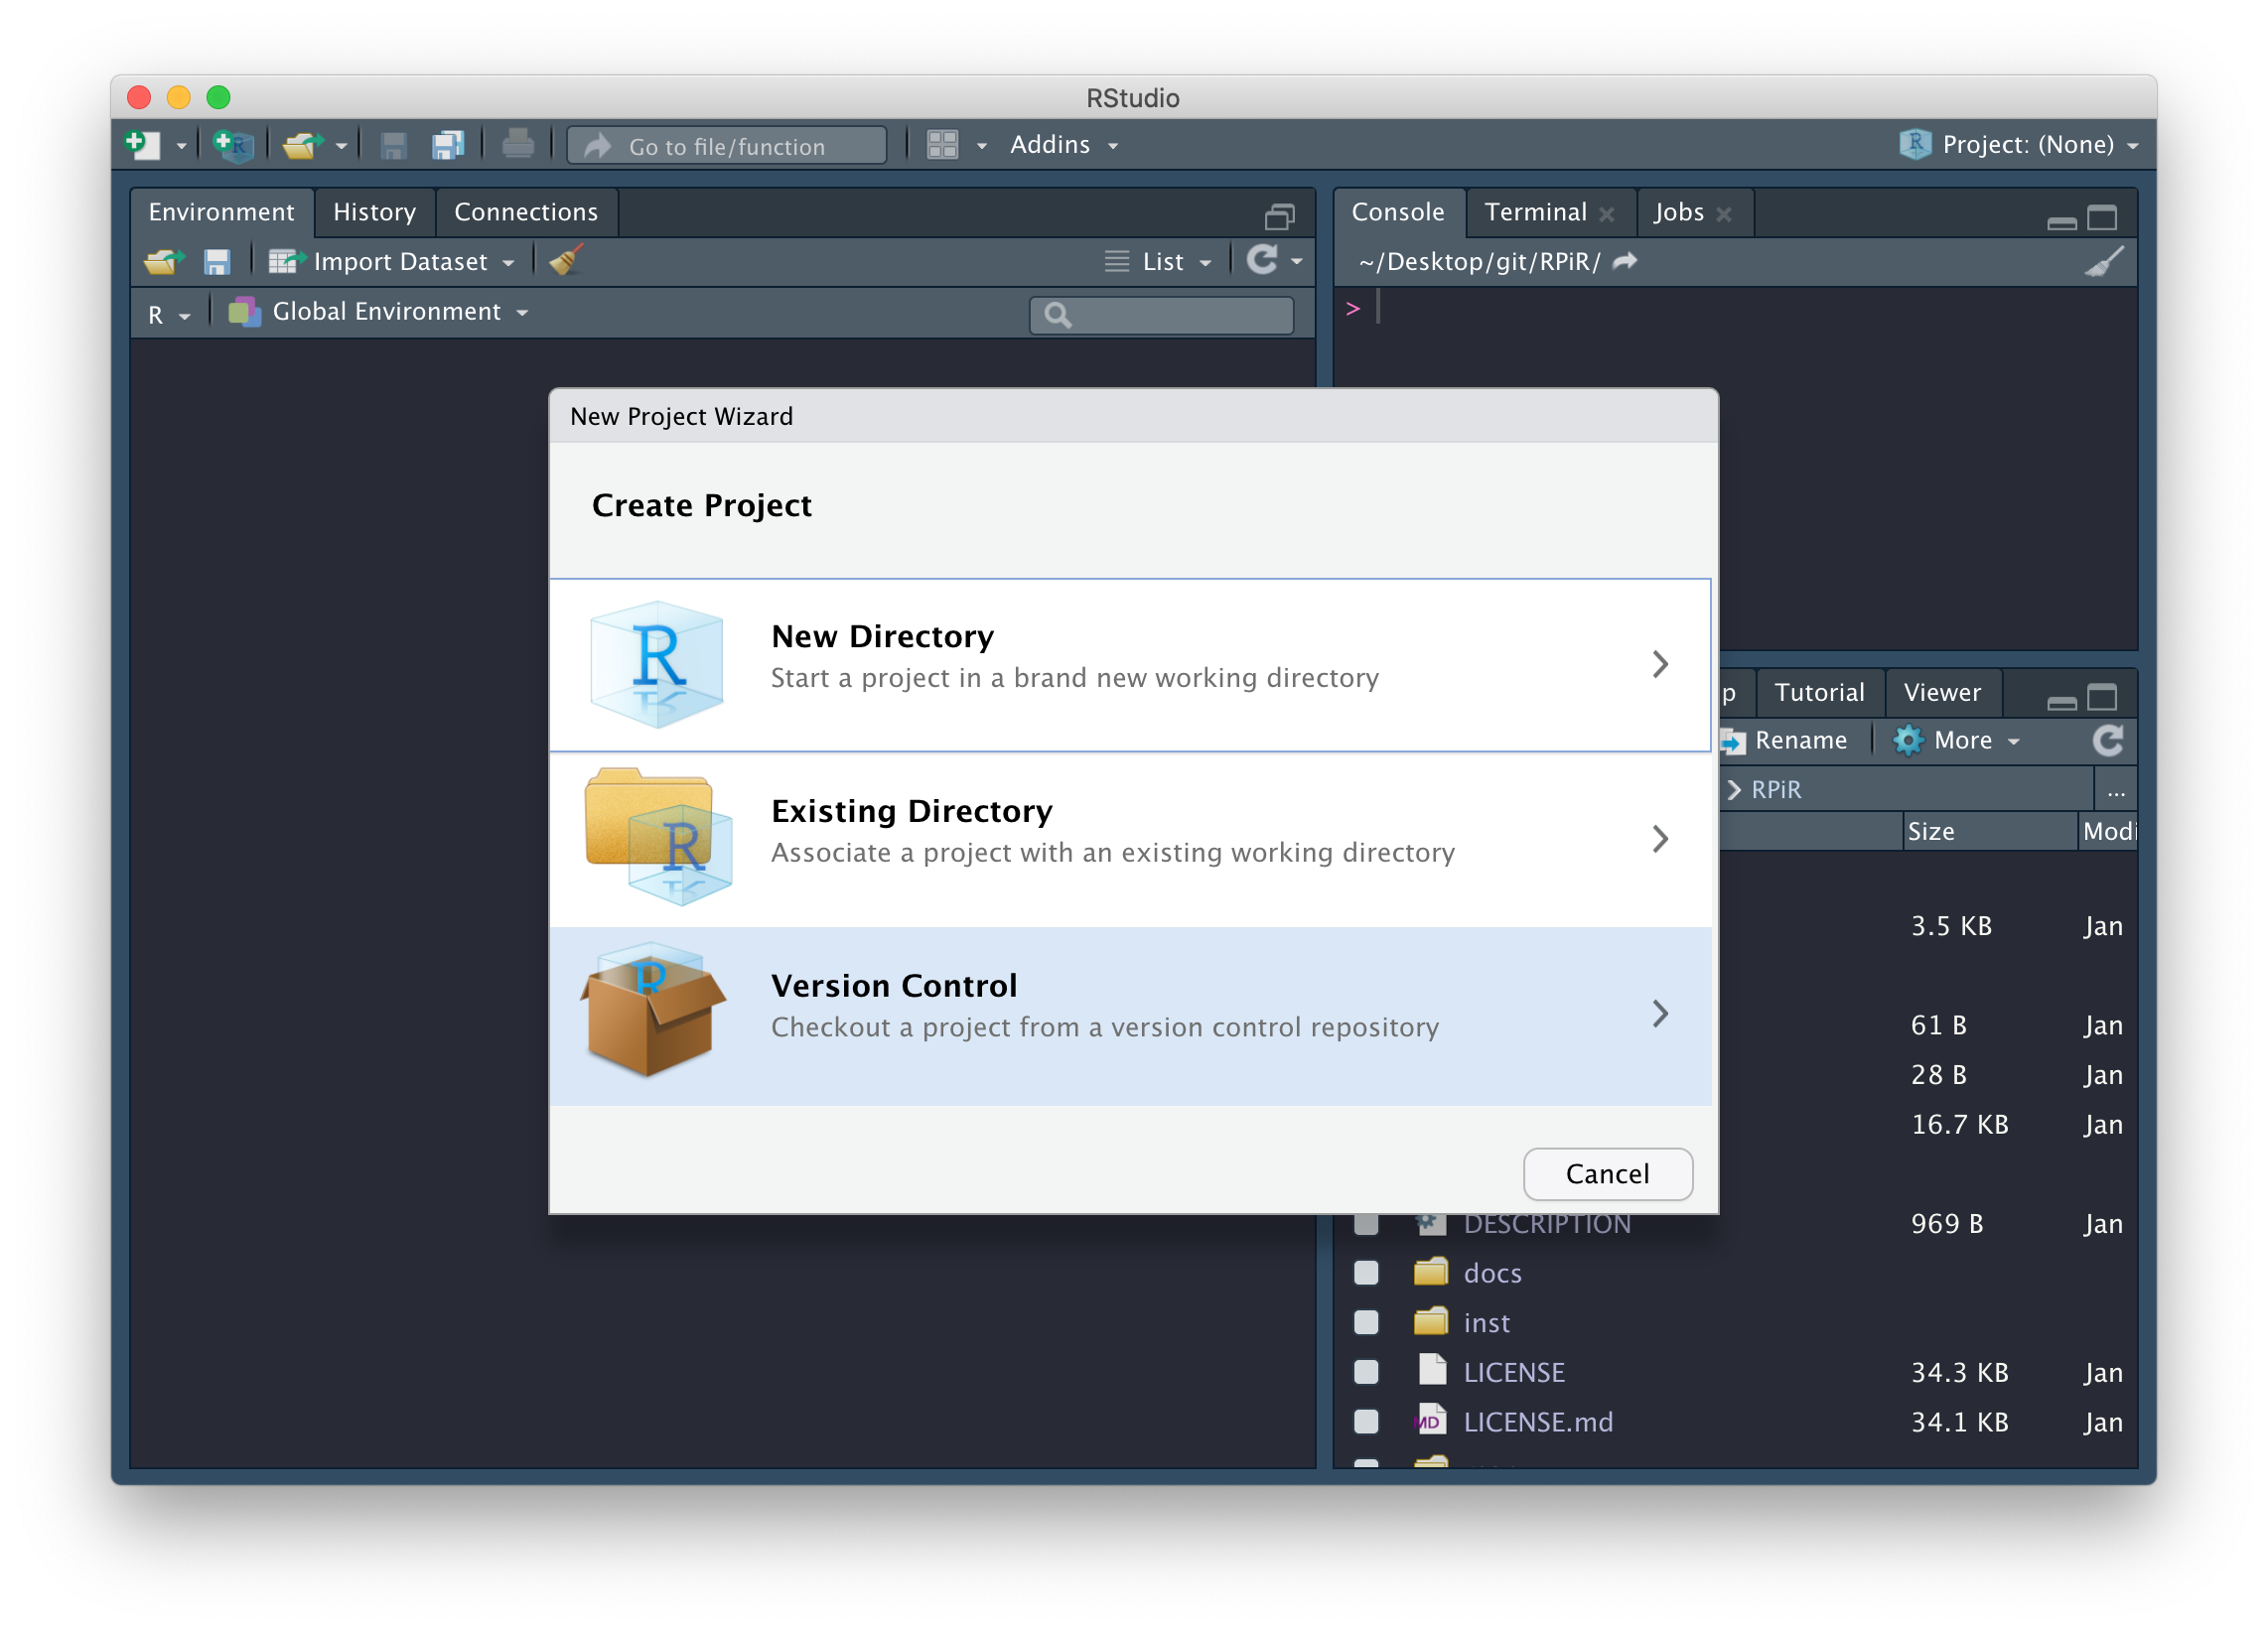
Then in RStudio, click File > New project…, then since we’re integrating version control into this project workflow, you should select Version Control.
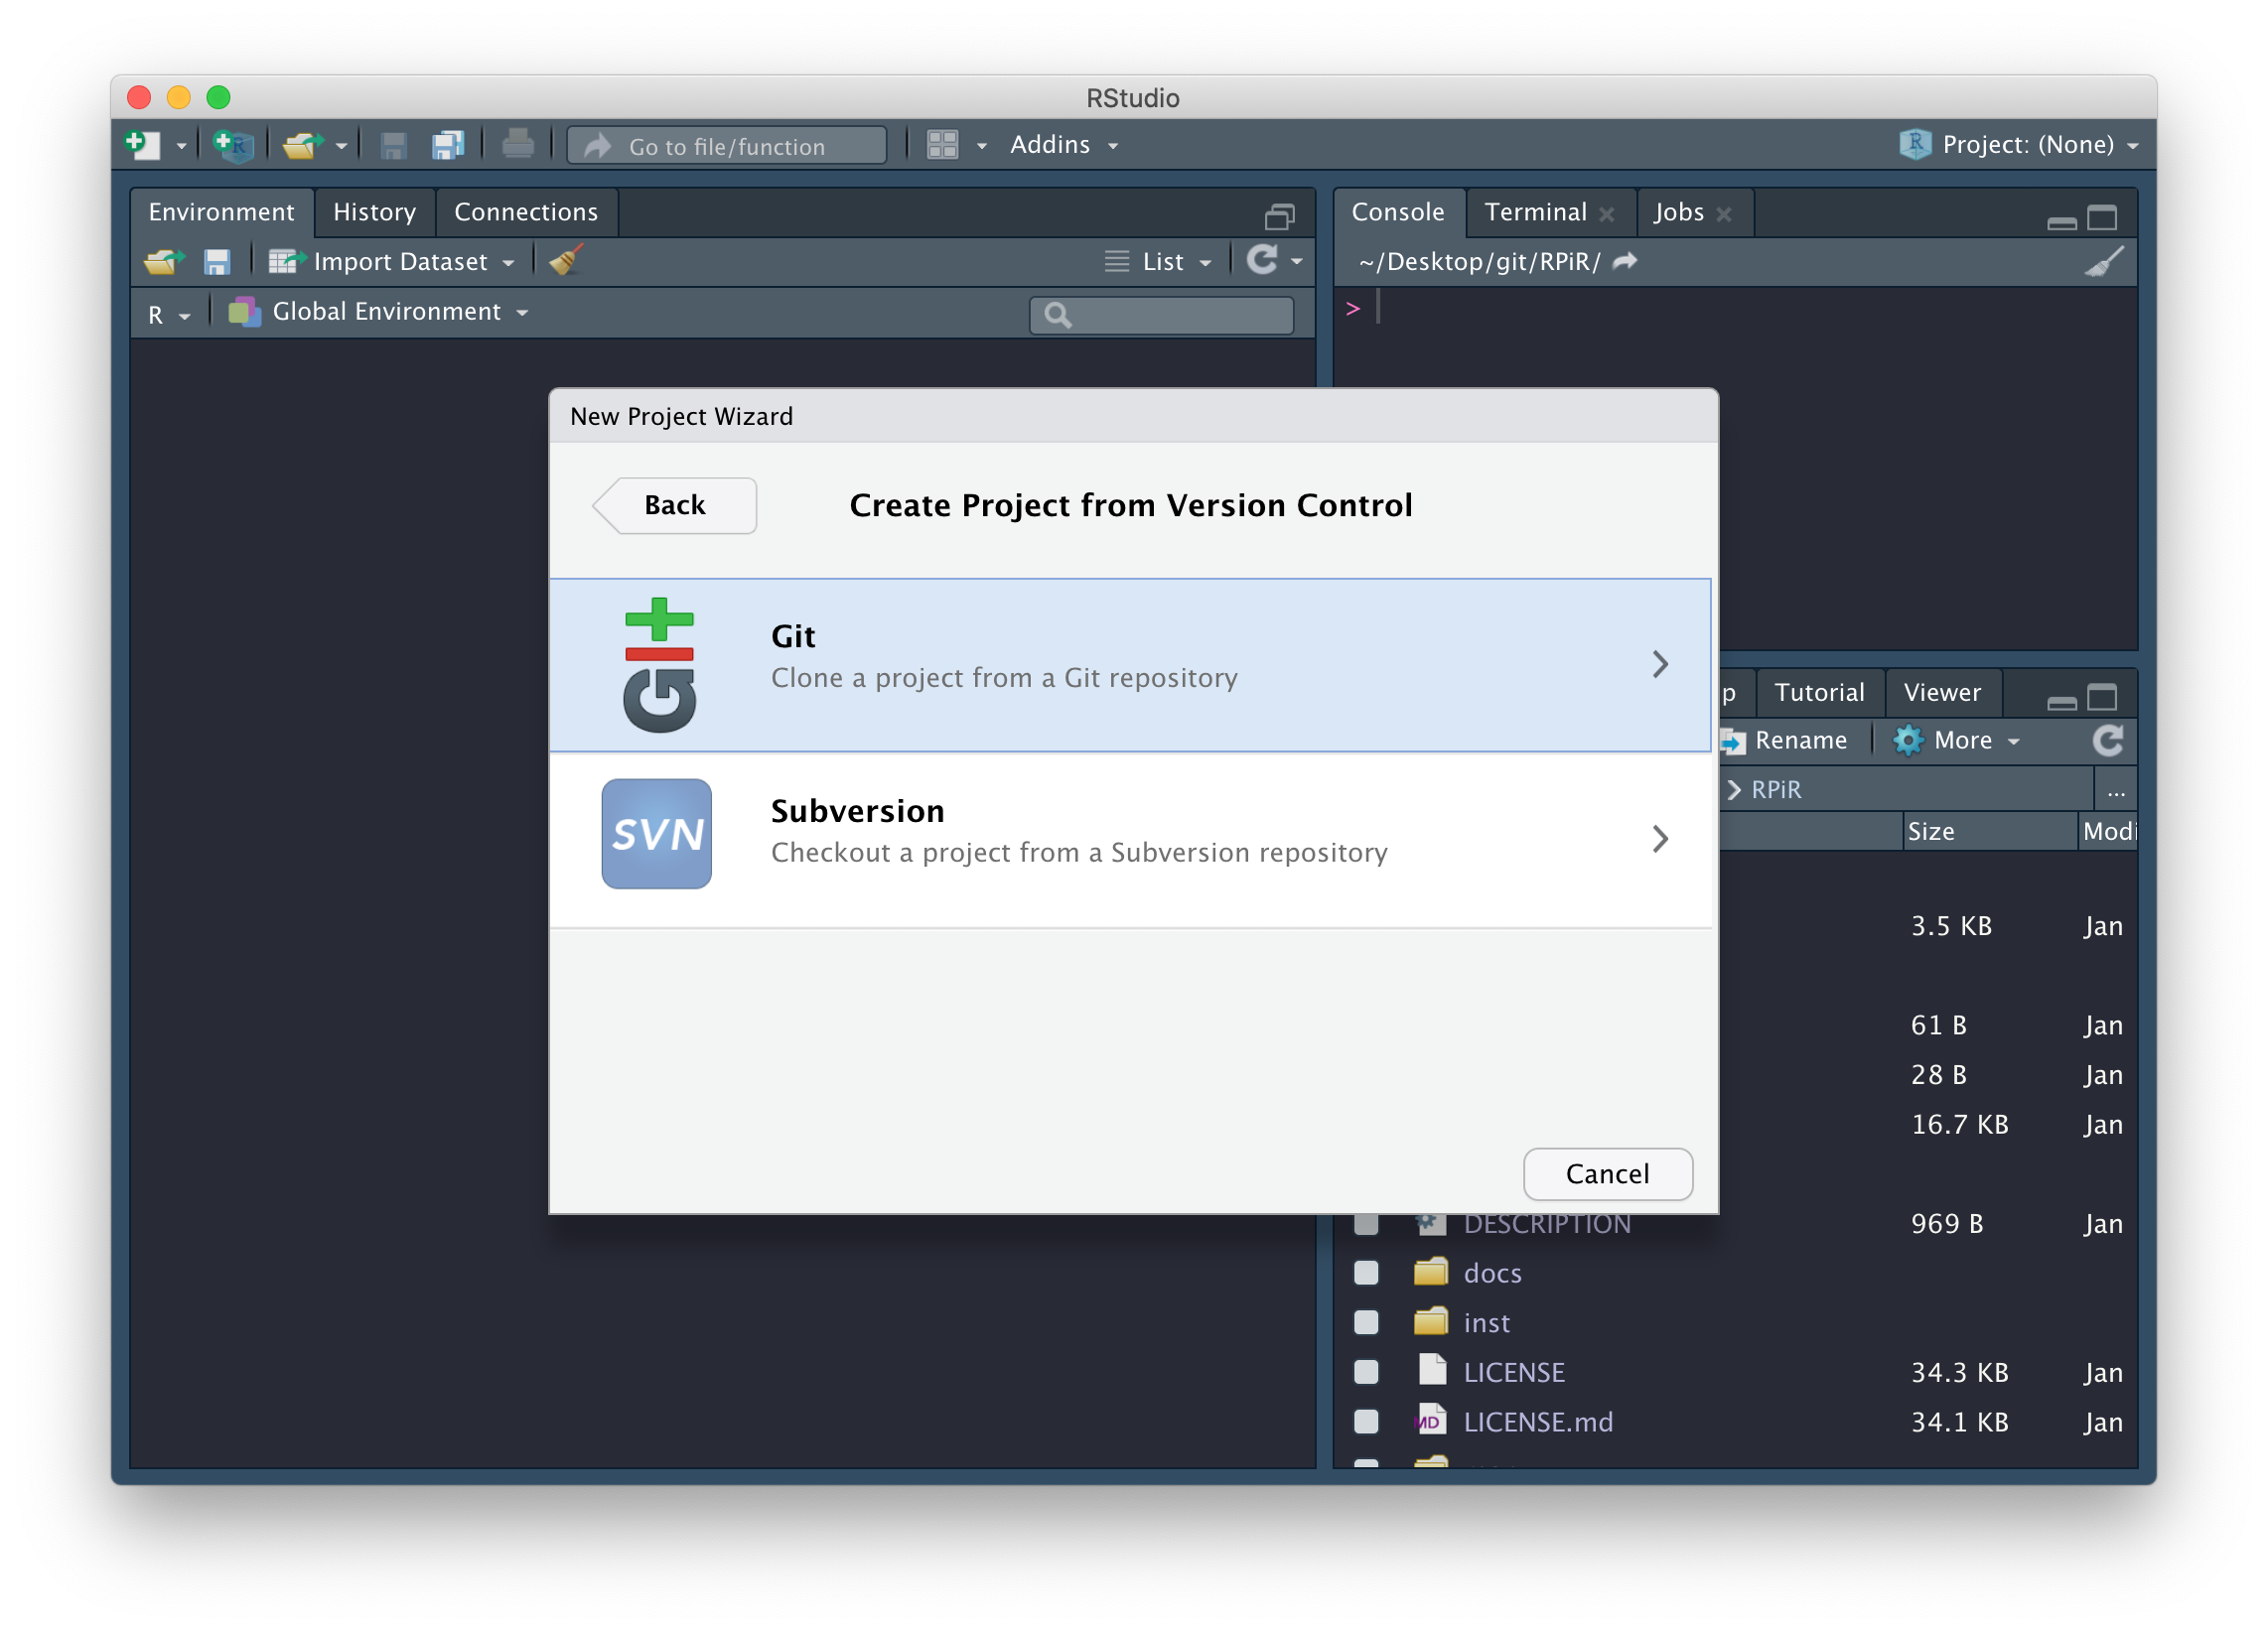
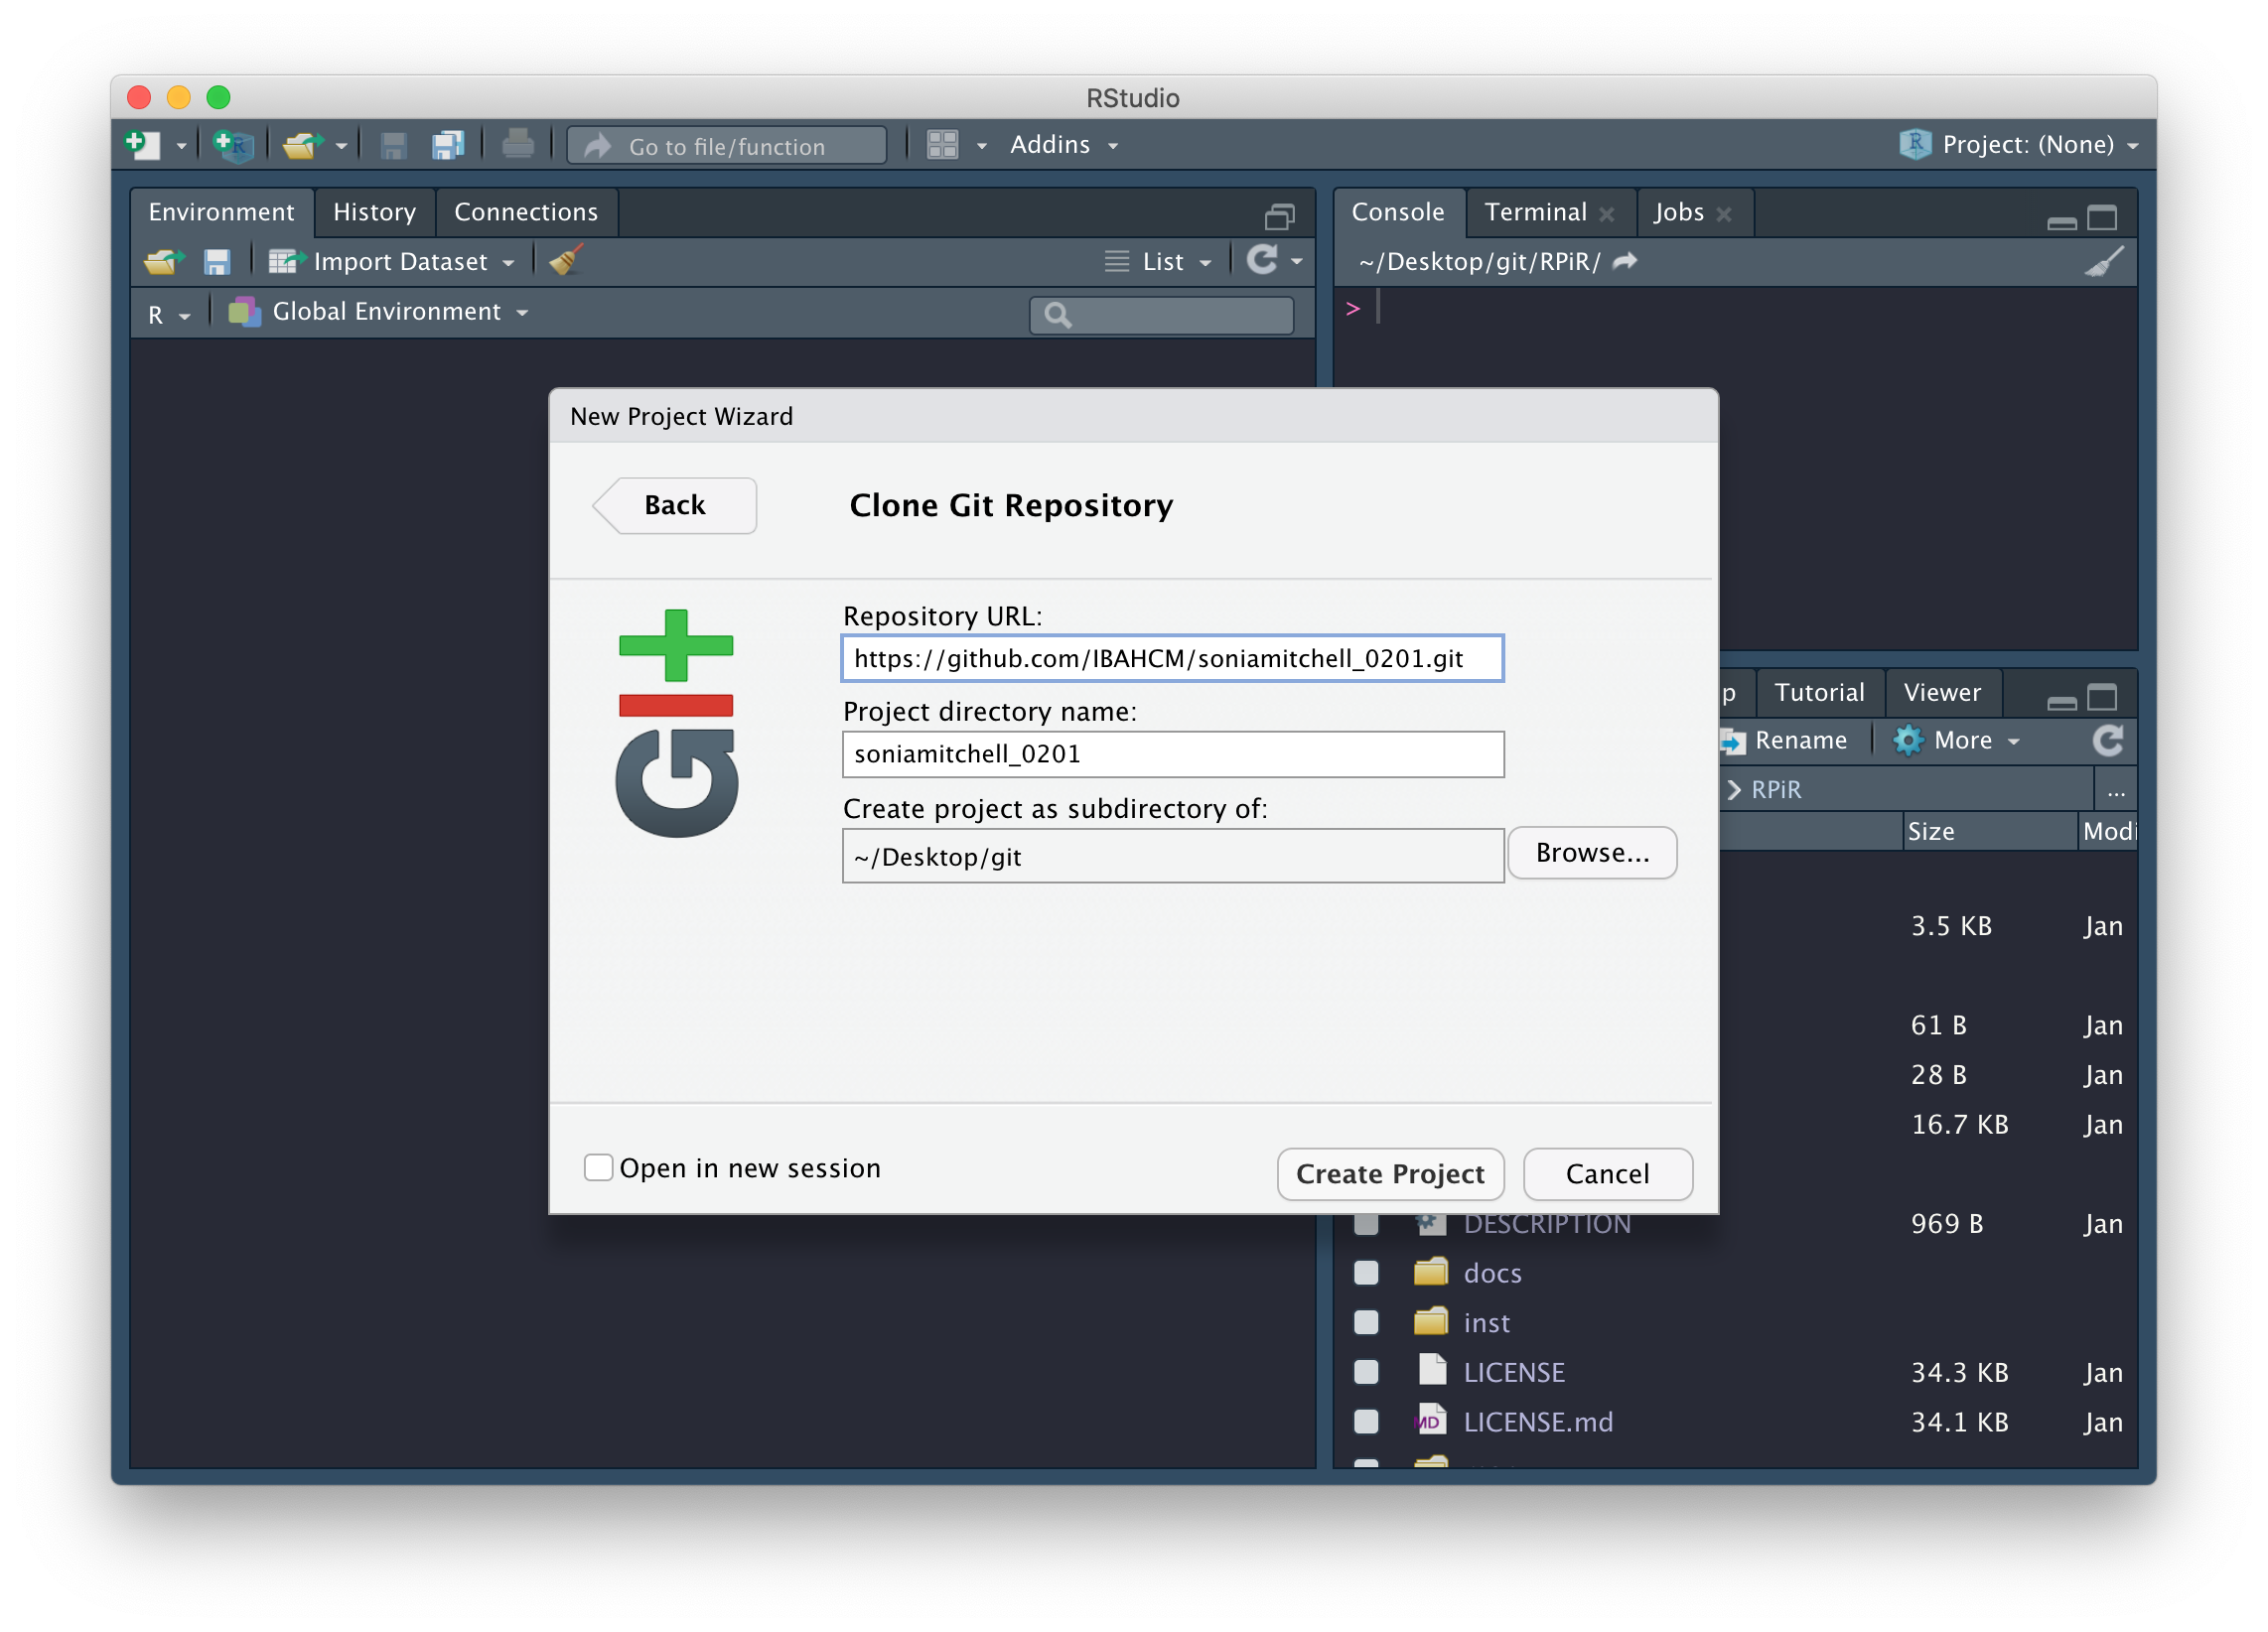
Select the option to clone a project from a Git repository.
Paste your Repository URL into the first box, then click Browse… and navigate to the git folder on your desktop. If you don’t have a git folder on your desktop then make one, as it’s good practice to keep all of your projects together and well organised. RStudio will create a new subdirectory that will mirror the contents of your Git repository (so make sure you don’t already have a folder with the same name as the repository you created, as this will cause problems). Now click Create Project and enter your GitHub username and password if you’re asked.
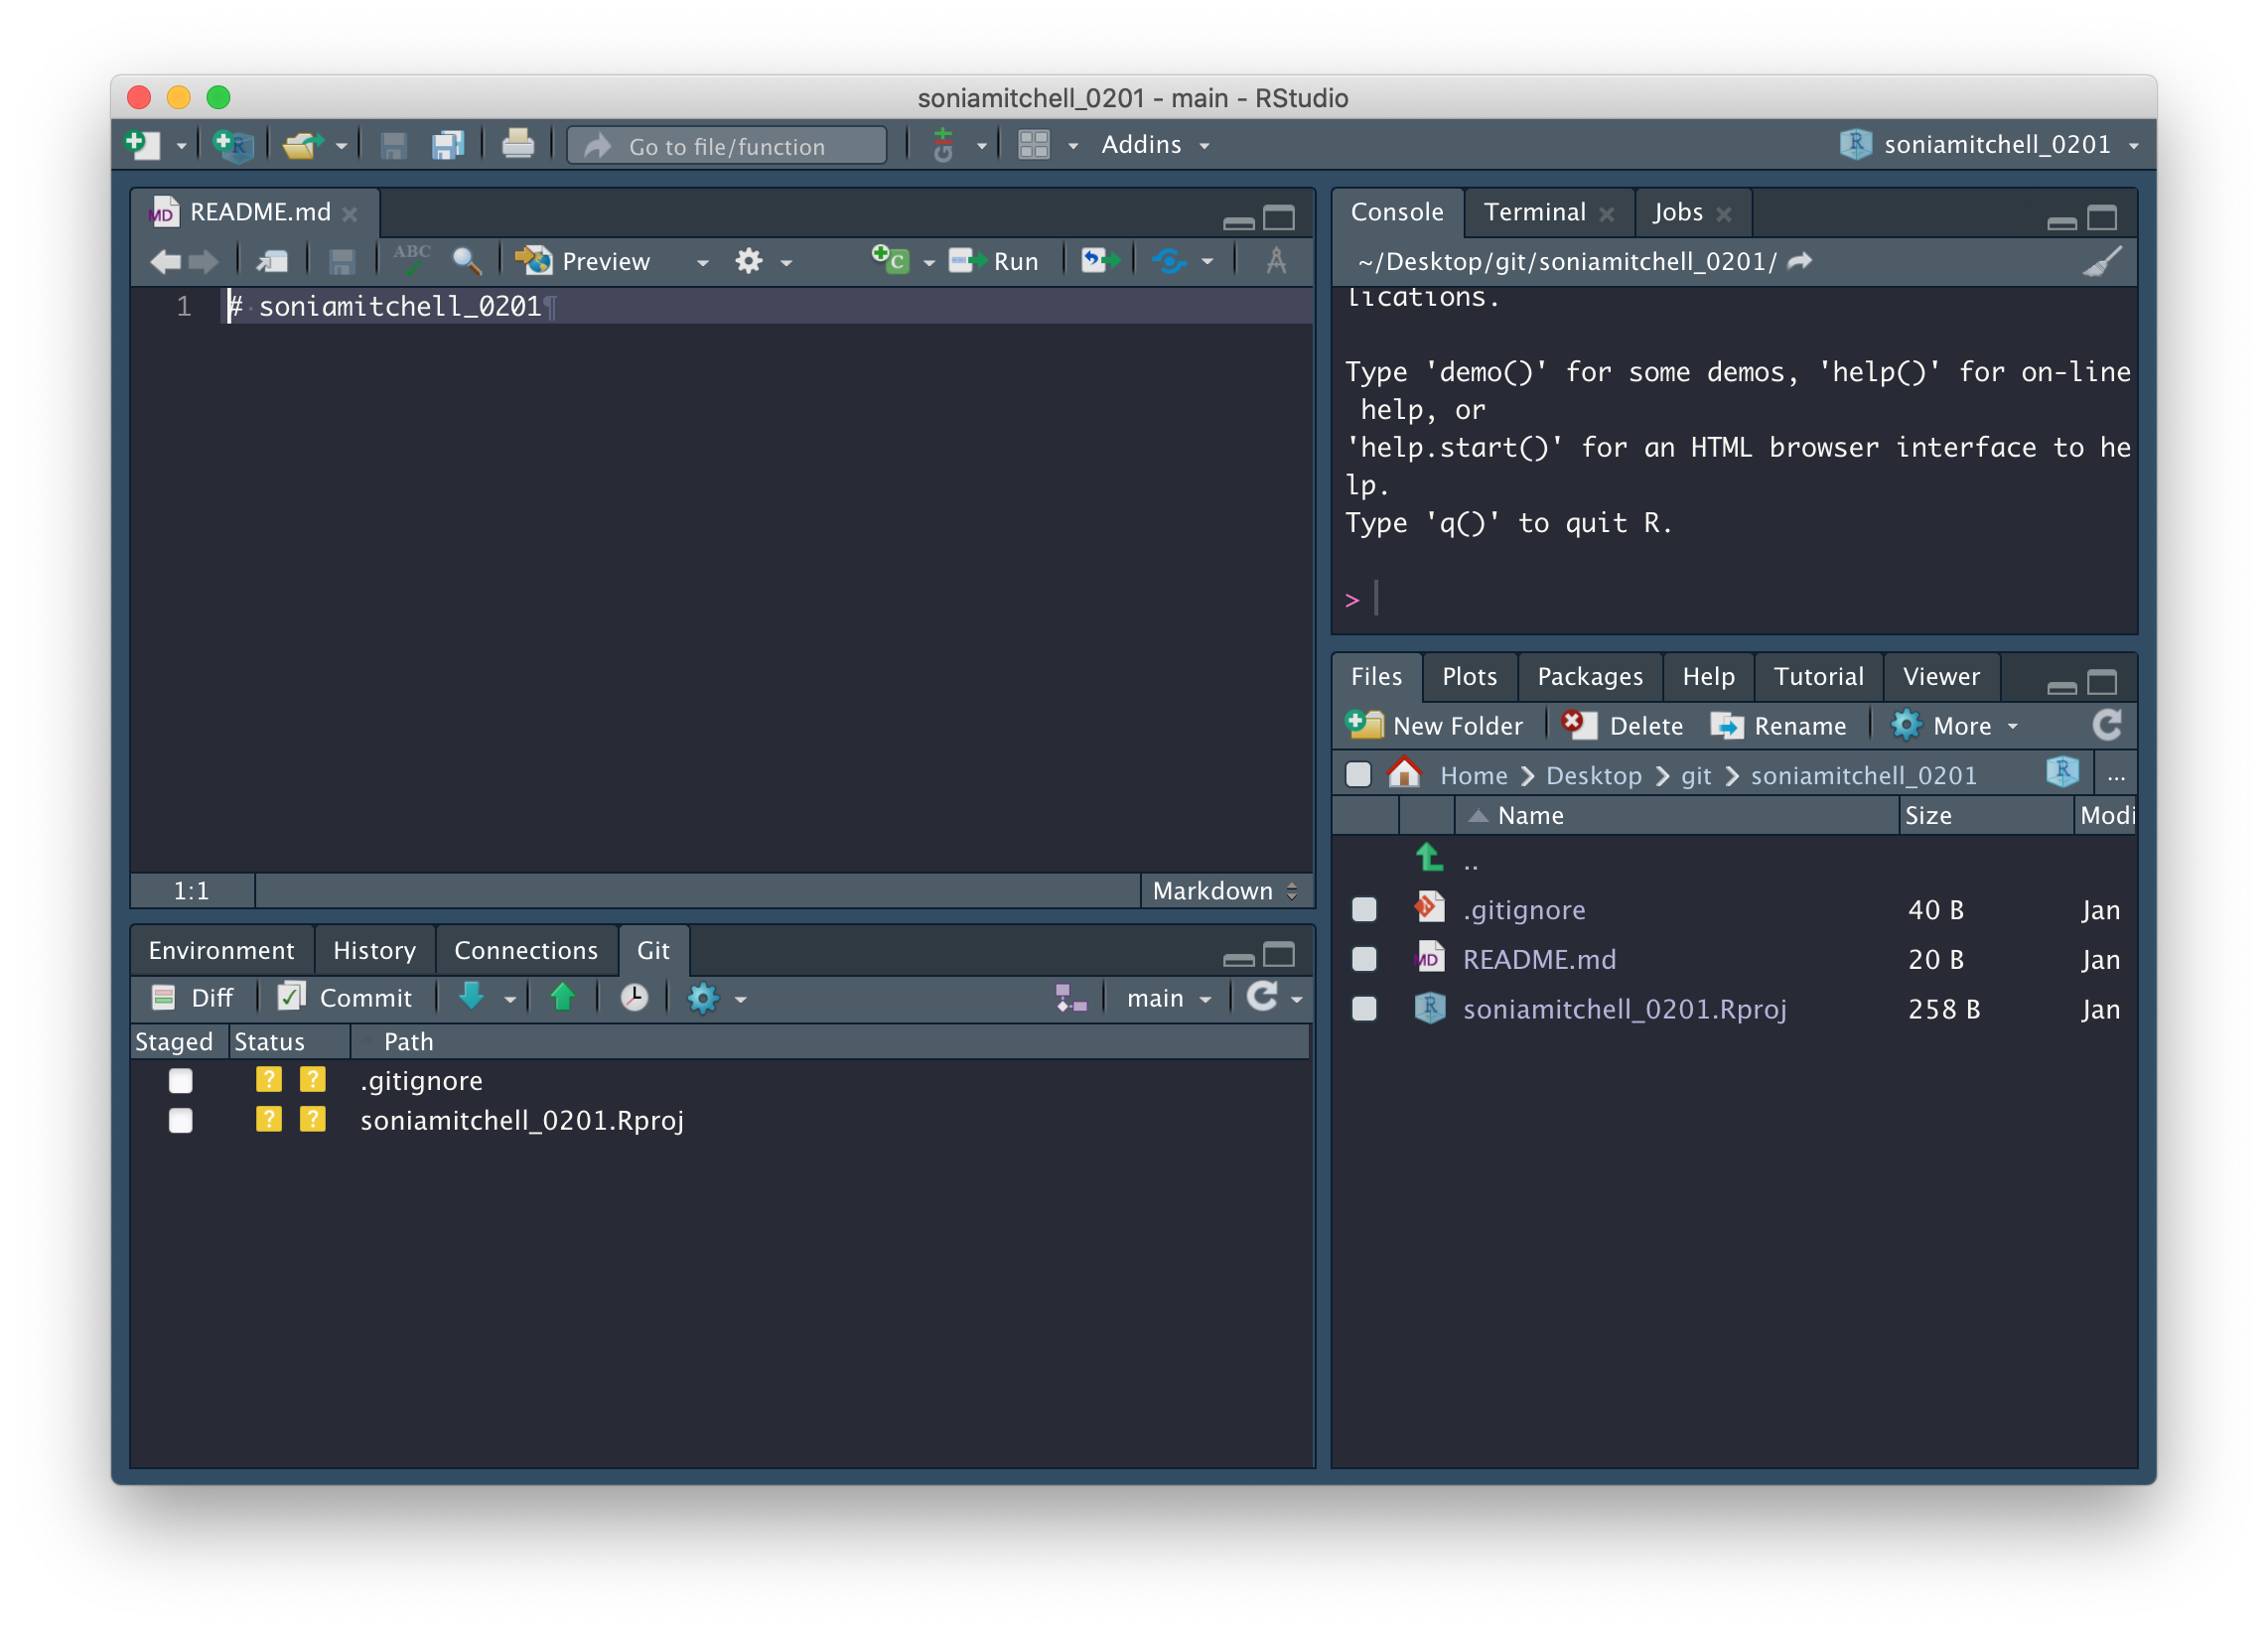
Congratulations! You have successfully created a new RStudio project
(now with added version control). In my example here (although note the
images are slightly different), (1) the RStudio project is called
richardreeveSeries01, (2) a new directory,
richardreeveSeries01, has been created, which is now my
working directory, and inside this directory are (3) three files,
including a GitHub README.md file (imported from your
GitHub repository), an RStudio project file
(richardreeveSeries01.Rproj), and an invisible
.gitignore file (created by RStudio).
Note the appearance of a new Git tab next to Connections. This is important.

How to use Git in RStudio
Compare the contents of your working directory to the files listed in
the Git tab. The Git tab is a useful tool that shows you
how your remote directory (your GitHub repository) differs from your
local directory (in this case
~/Desktop/git/richardreeveSeries01). Currently, the
README.md file in your local directory is identical to the
one in your remote directory. That’s why you can’t see it in the Git tab. Instead, .gitignore
and richardreeveSeries01.Rproj are listed with yellow
question marks in the Status
column. What do these icons mean?
- “?” - Files or directories that don’t currently exist in your git
repository (you either want to commit these or add them to
.gitignore) - “A” - Files that have been staged and are ready to commit (you’re in the process of committing these)
- “M” - Files that are modified versions of those in the repository (you definately want to commit these)
- “D” - Files that are no longer in your local directory (you’ve likely deleted these and want to commit their absence to GitHub)
Open the README.md file by clicking on its filename in
the Files tab. Does this look
familiar? (Compare the contents of this file to your repository on
GitHub)
Usually a GitHub README (written in GitHub
Flavored Markdown) will describe the contents of the GitHub
repository or give an example of how to use the contents of said
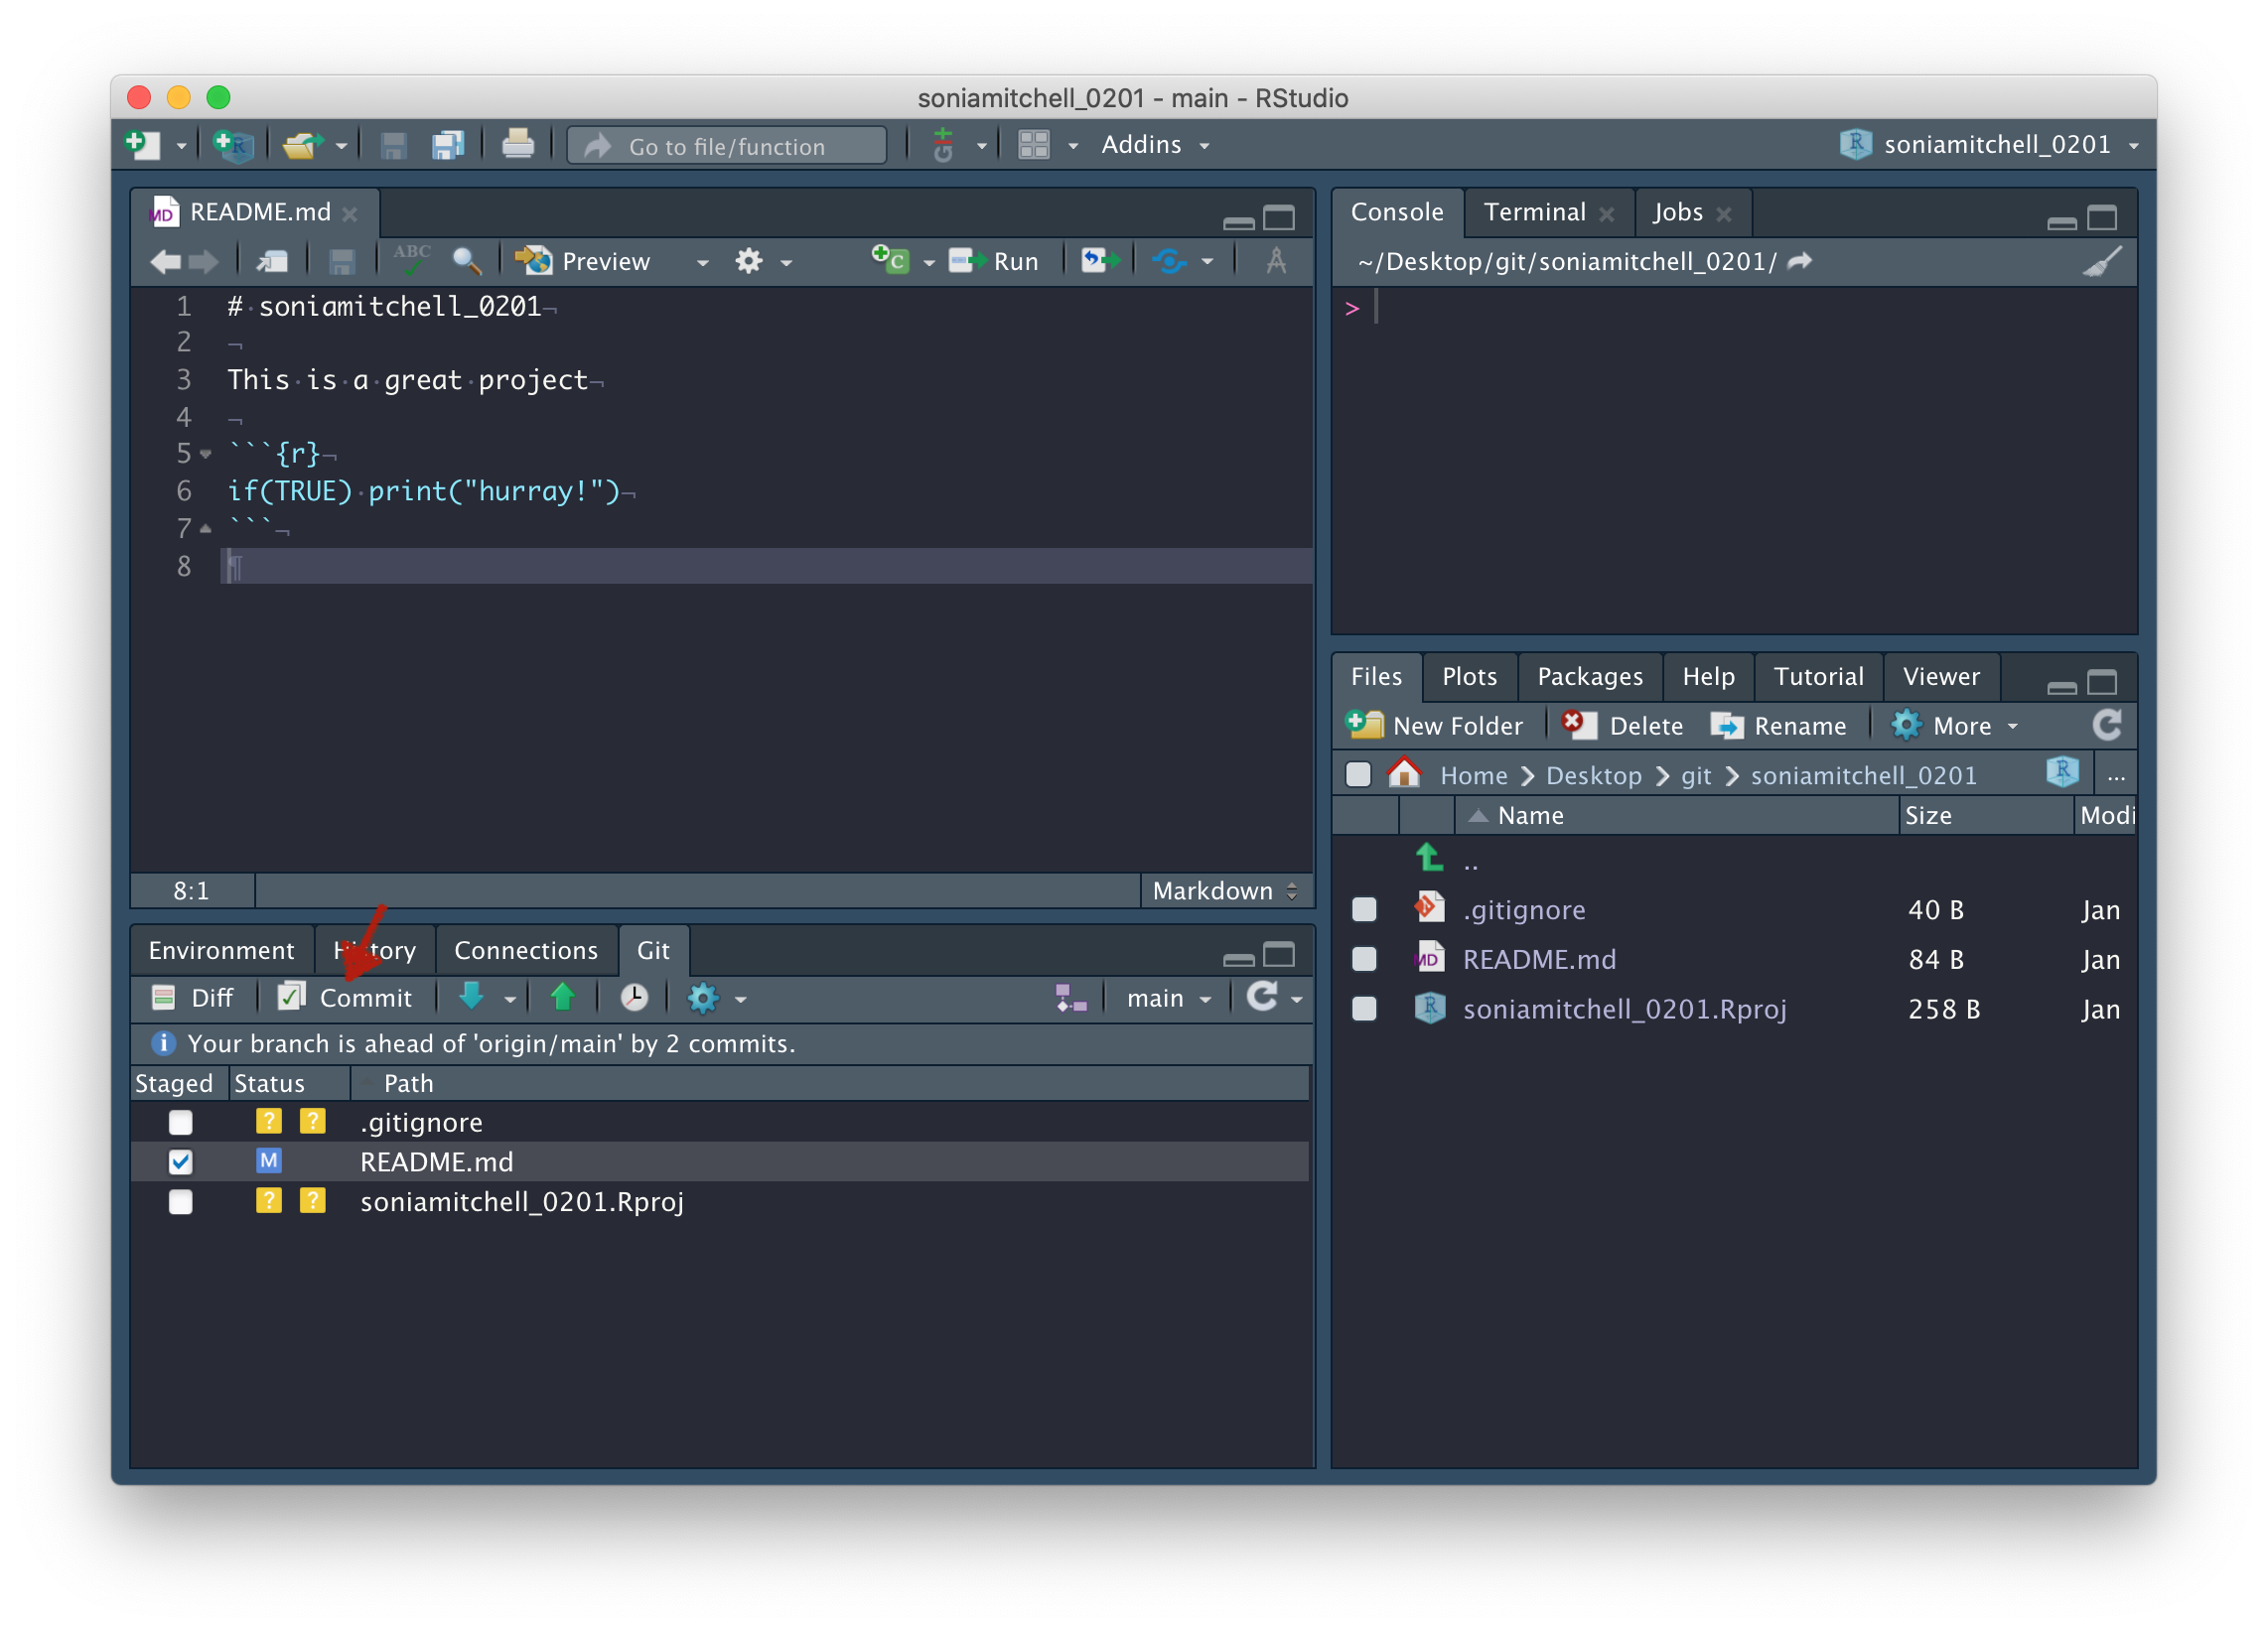
repository. Make some edits to README.md and save
your file. Note that when we make edits to the README file, its
Status changes to “M”. This means
that the file in your local directory is no longer identical to the file
in your remote directory (on GitHub). Check the box next to the file you
want to commit (README.md), then click Commit.
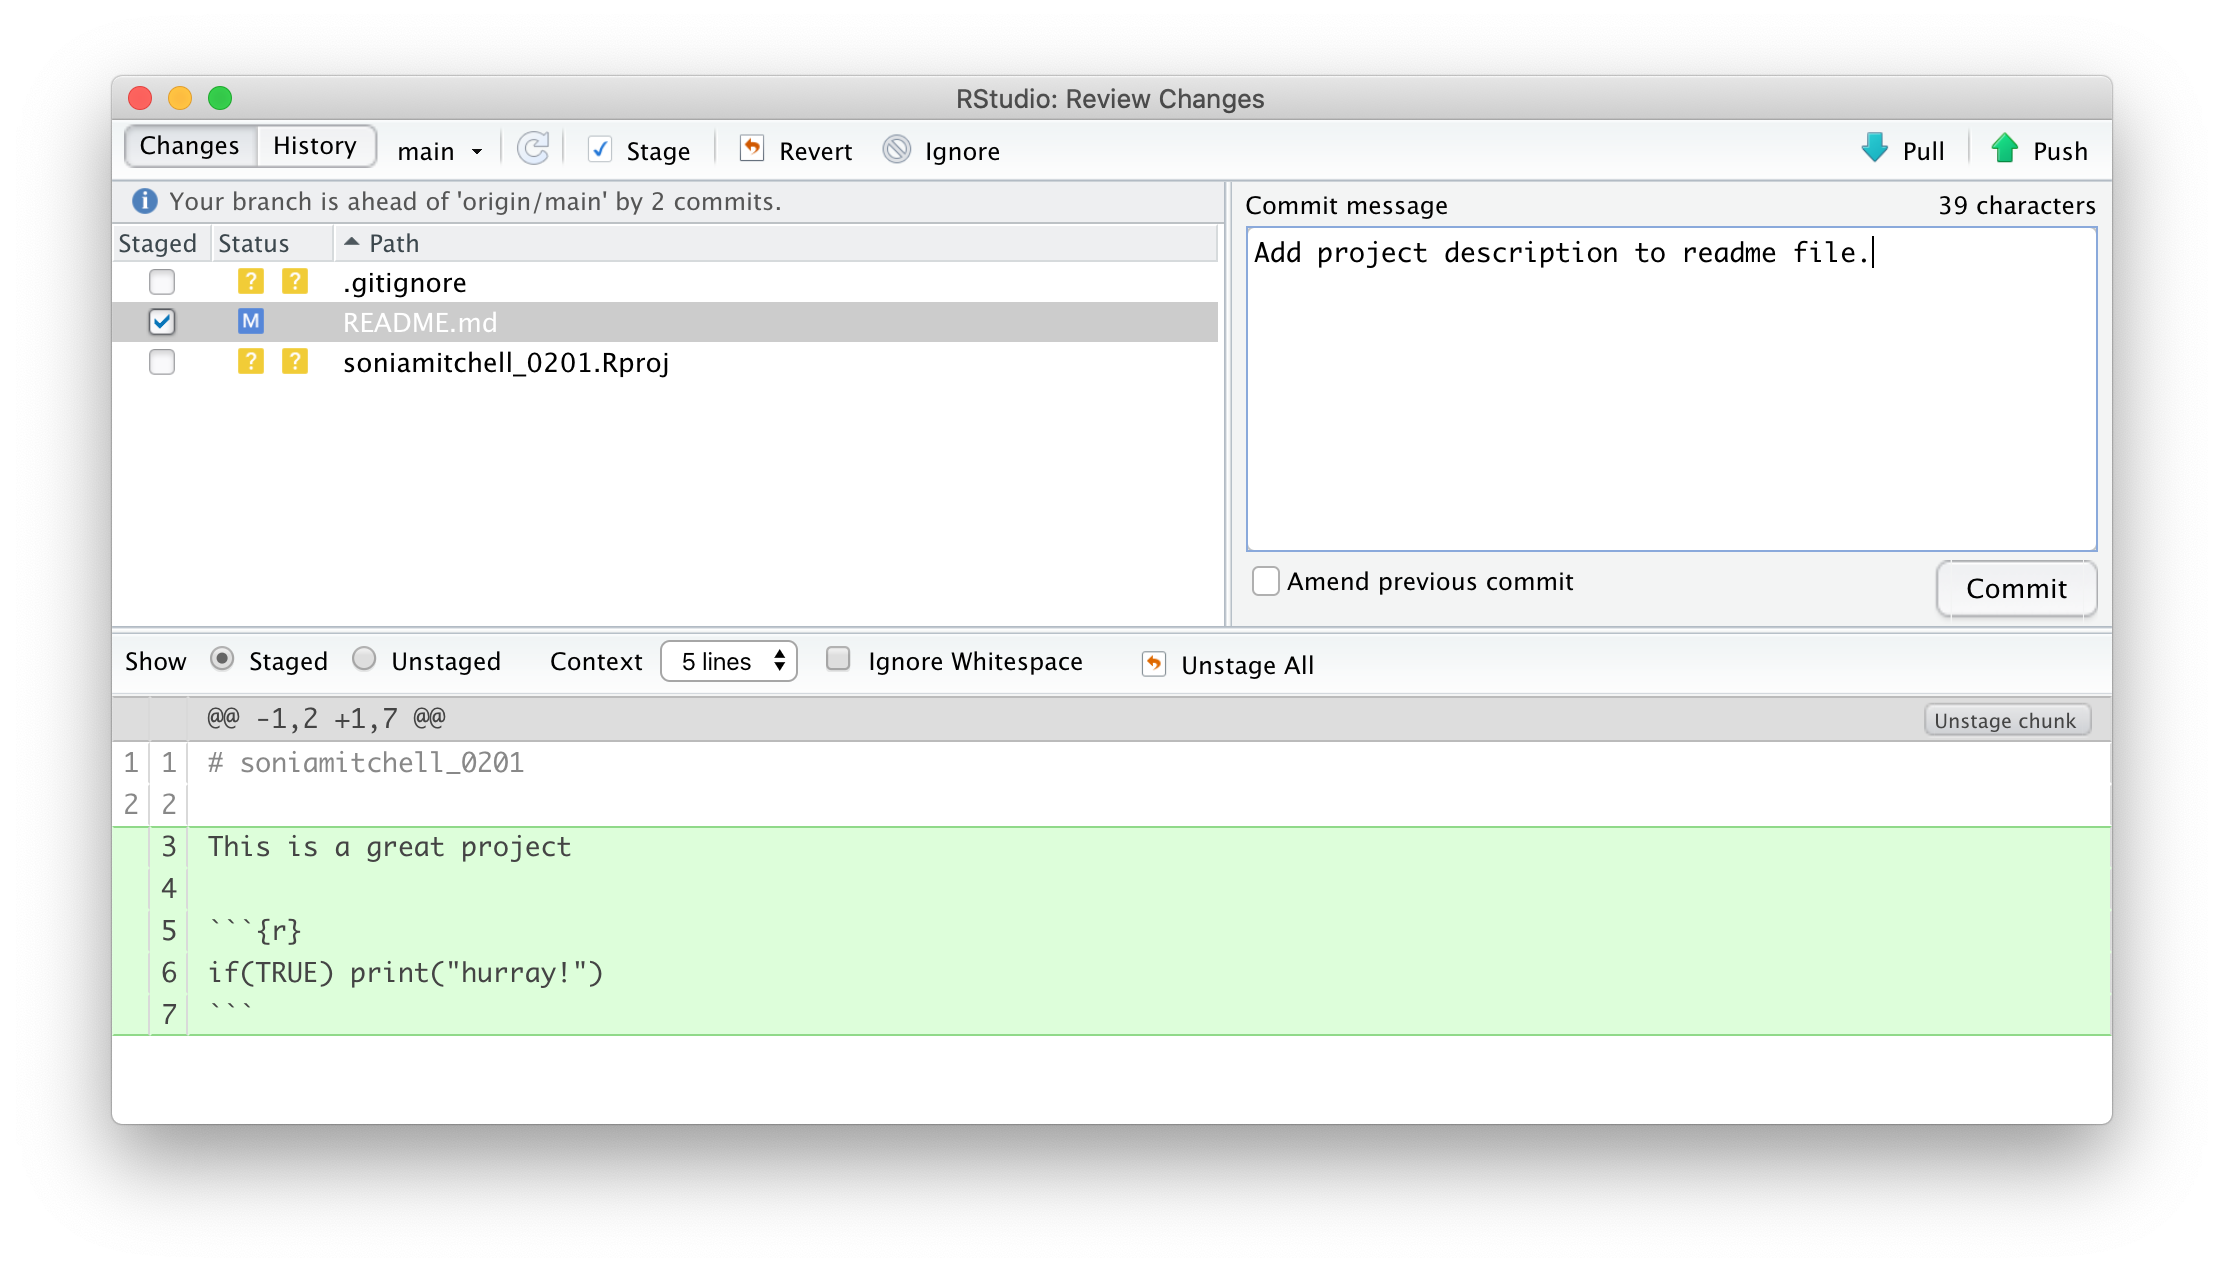
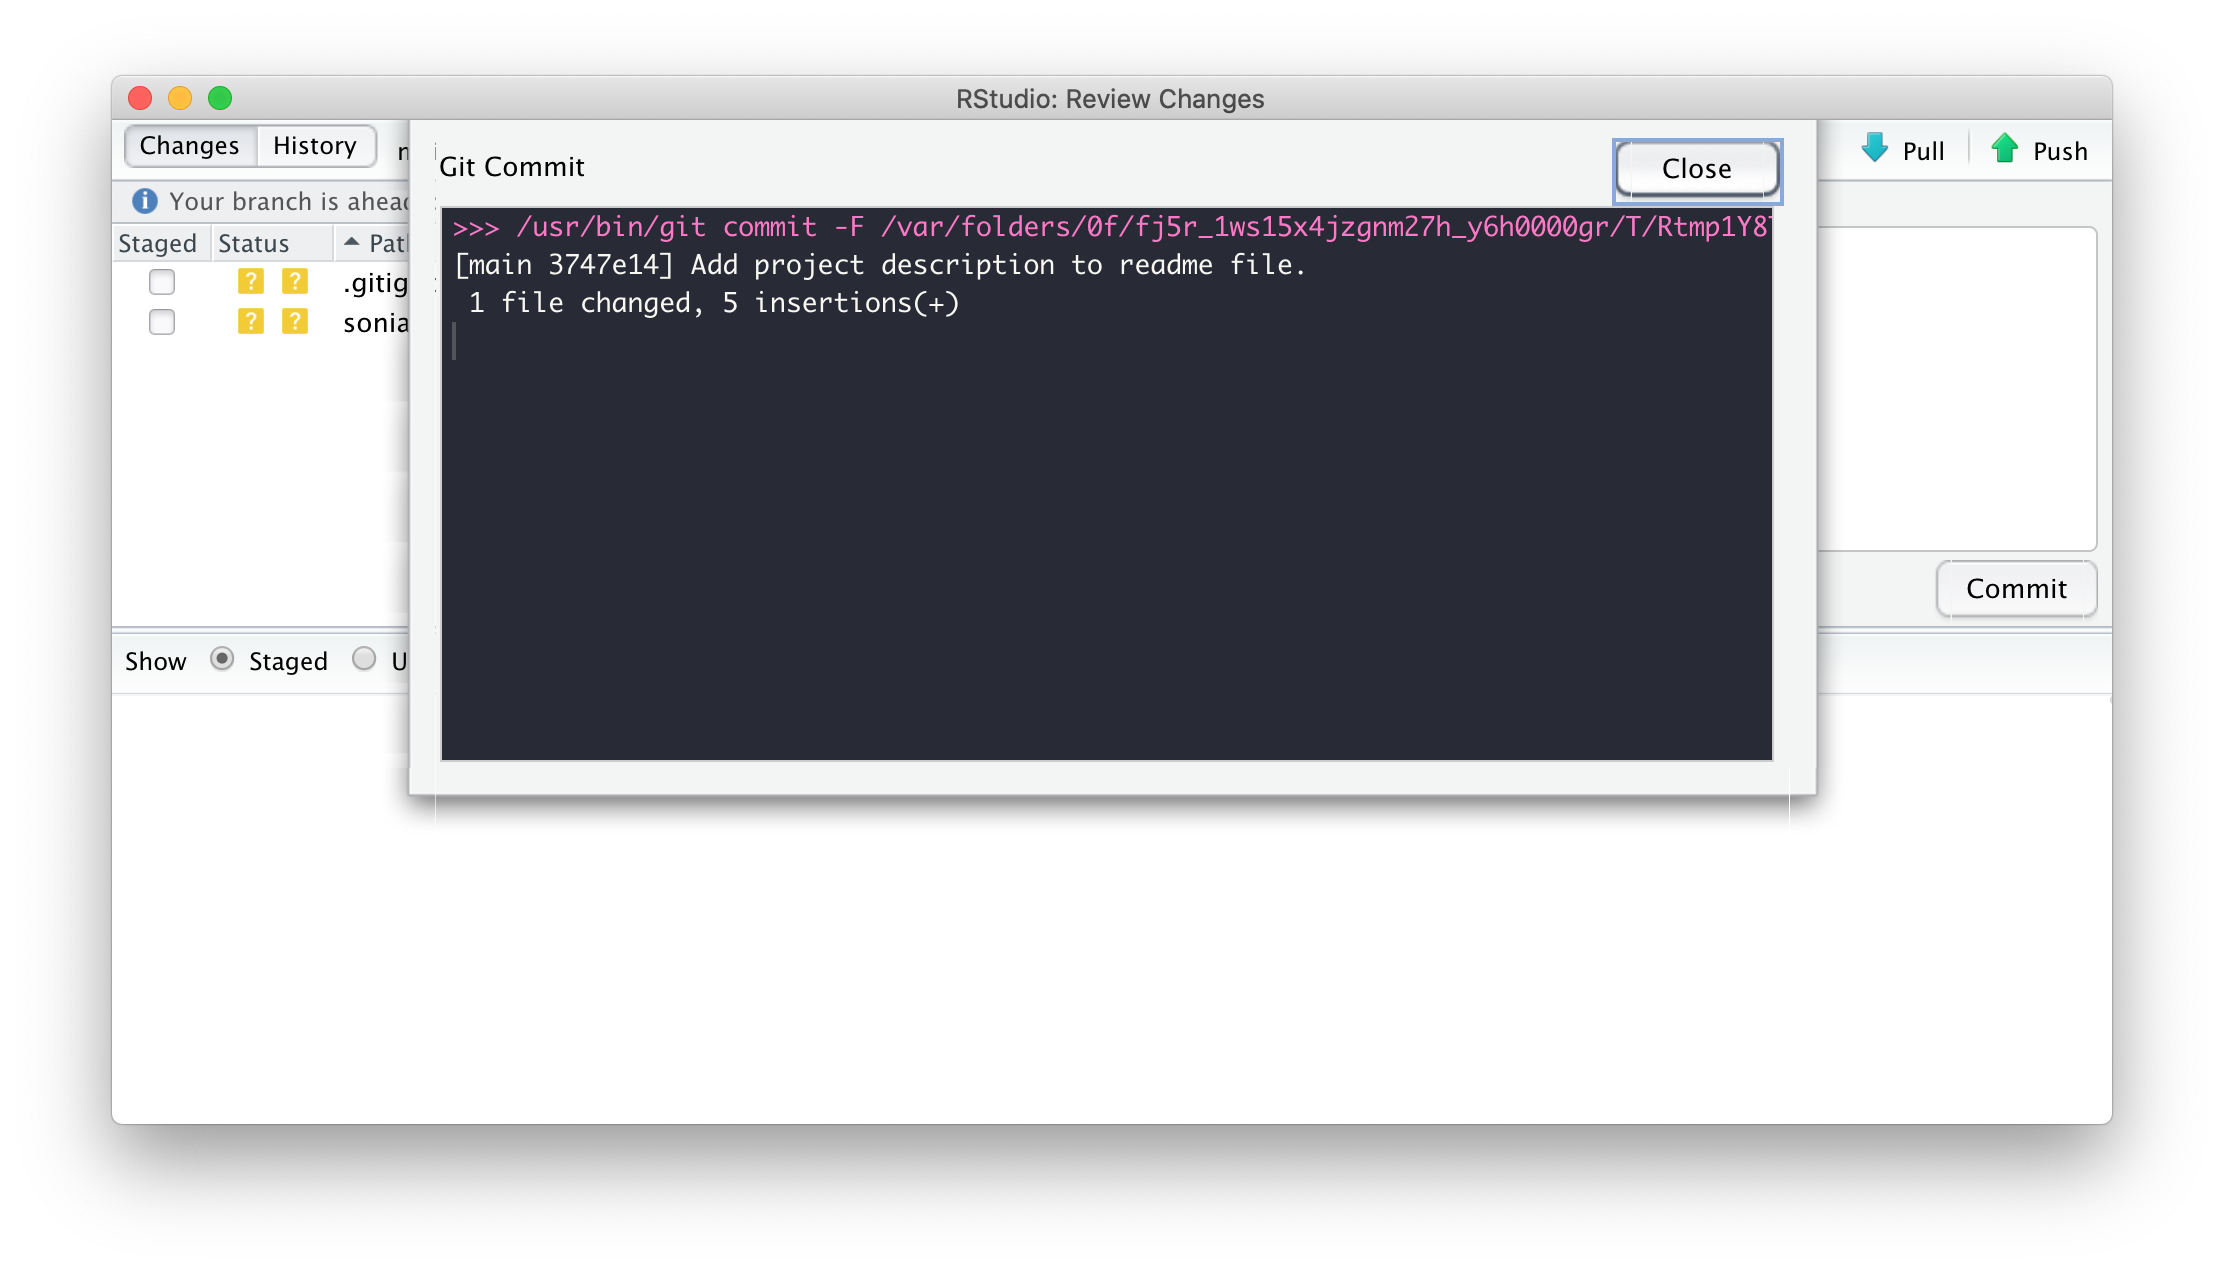
The RStudio: Review Changes
window has opened. Make sure the checkbox is ticked next to
README.md and enter a Commit
message. Your message should describe the changes you’ve made to
the file you’re uploading. These changes are shown in the lower half of
the screen, with deletions and insertions highlighted in red and green,
respectively. Click Commit to stage
your changes (preparing to upload to GitHub).
Congratulations! README.md is now staged, with 5
insertions. Close the RStudio: Review Changes window.
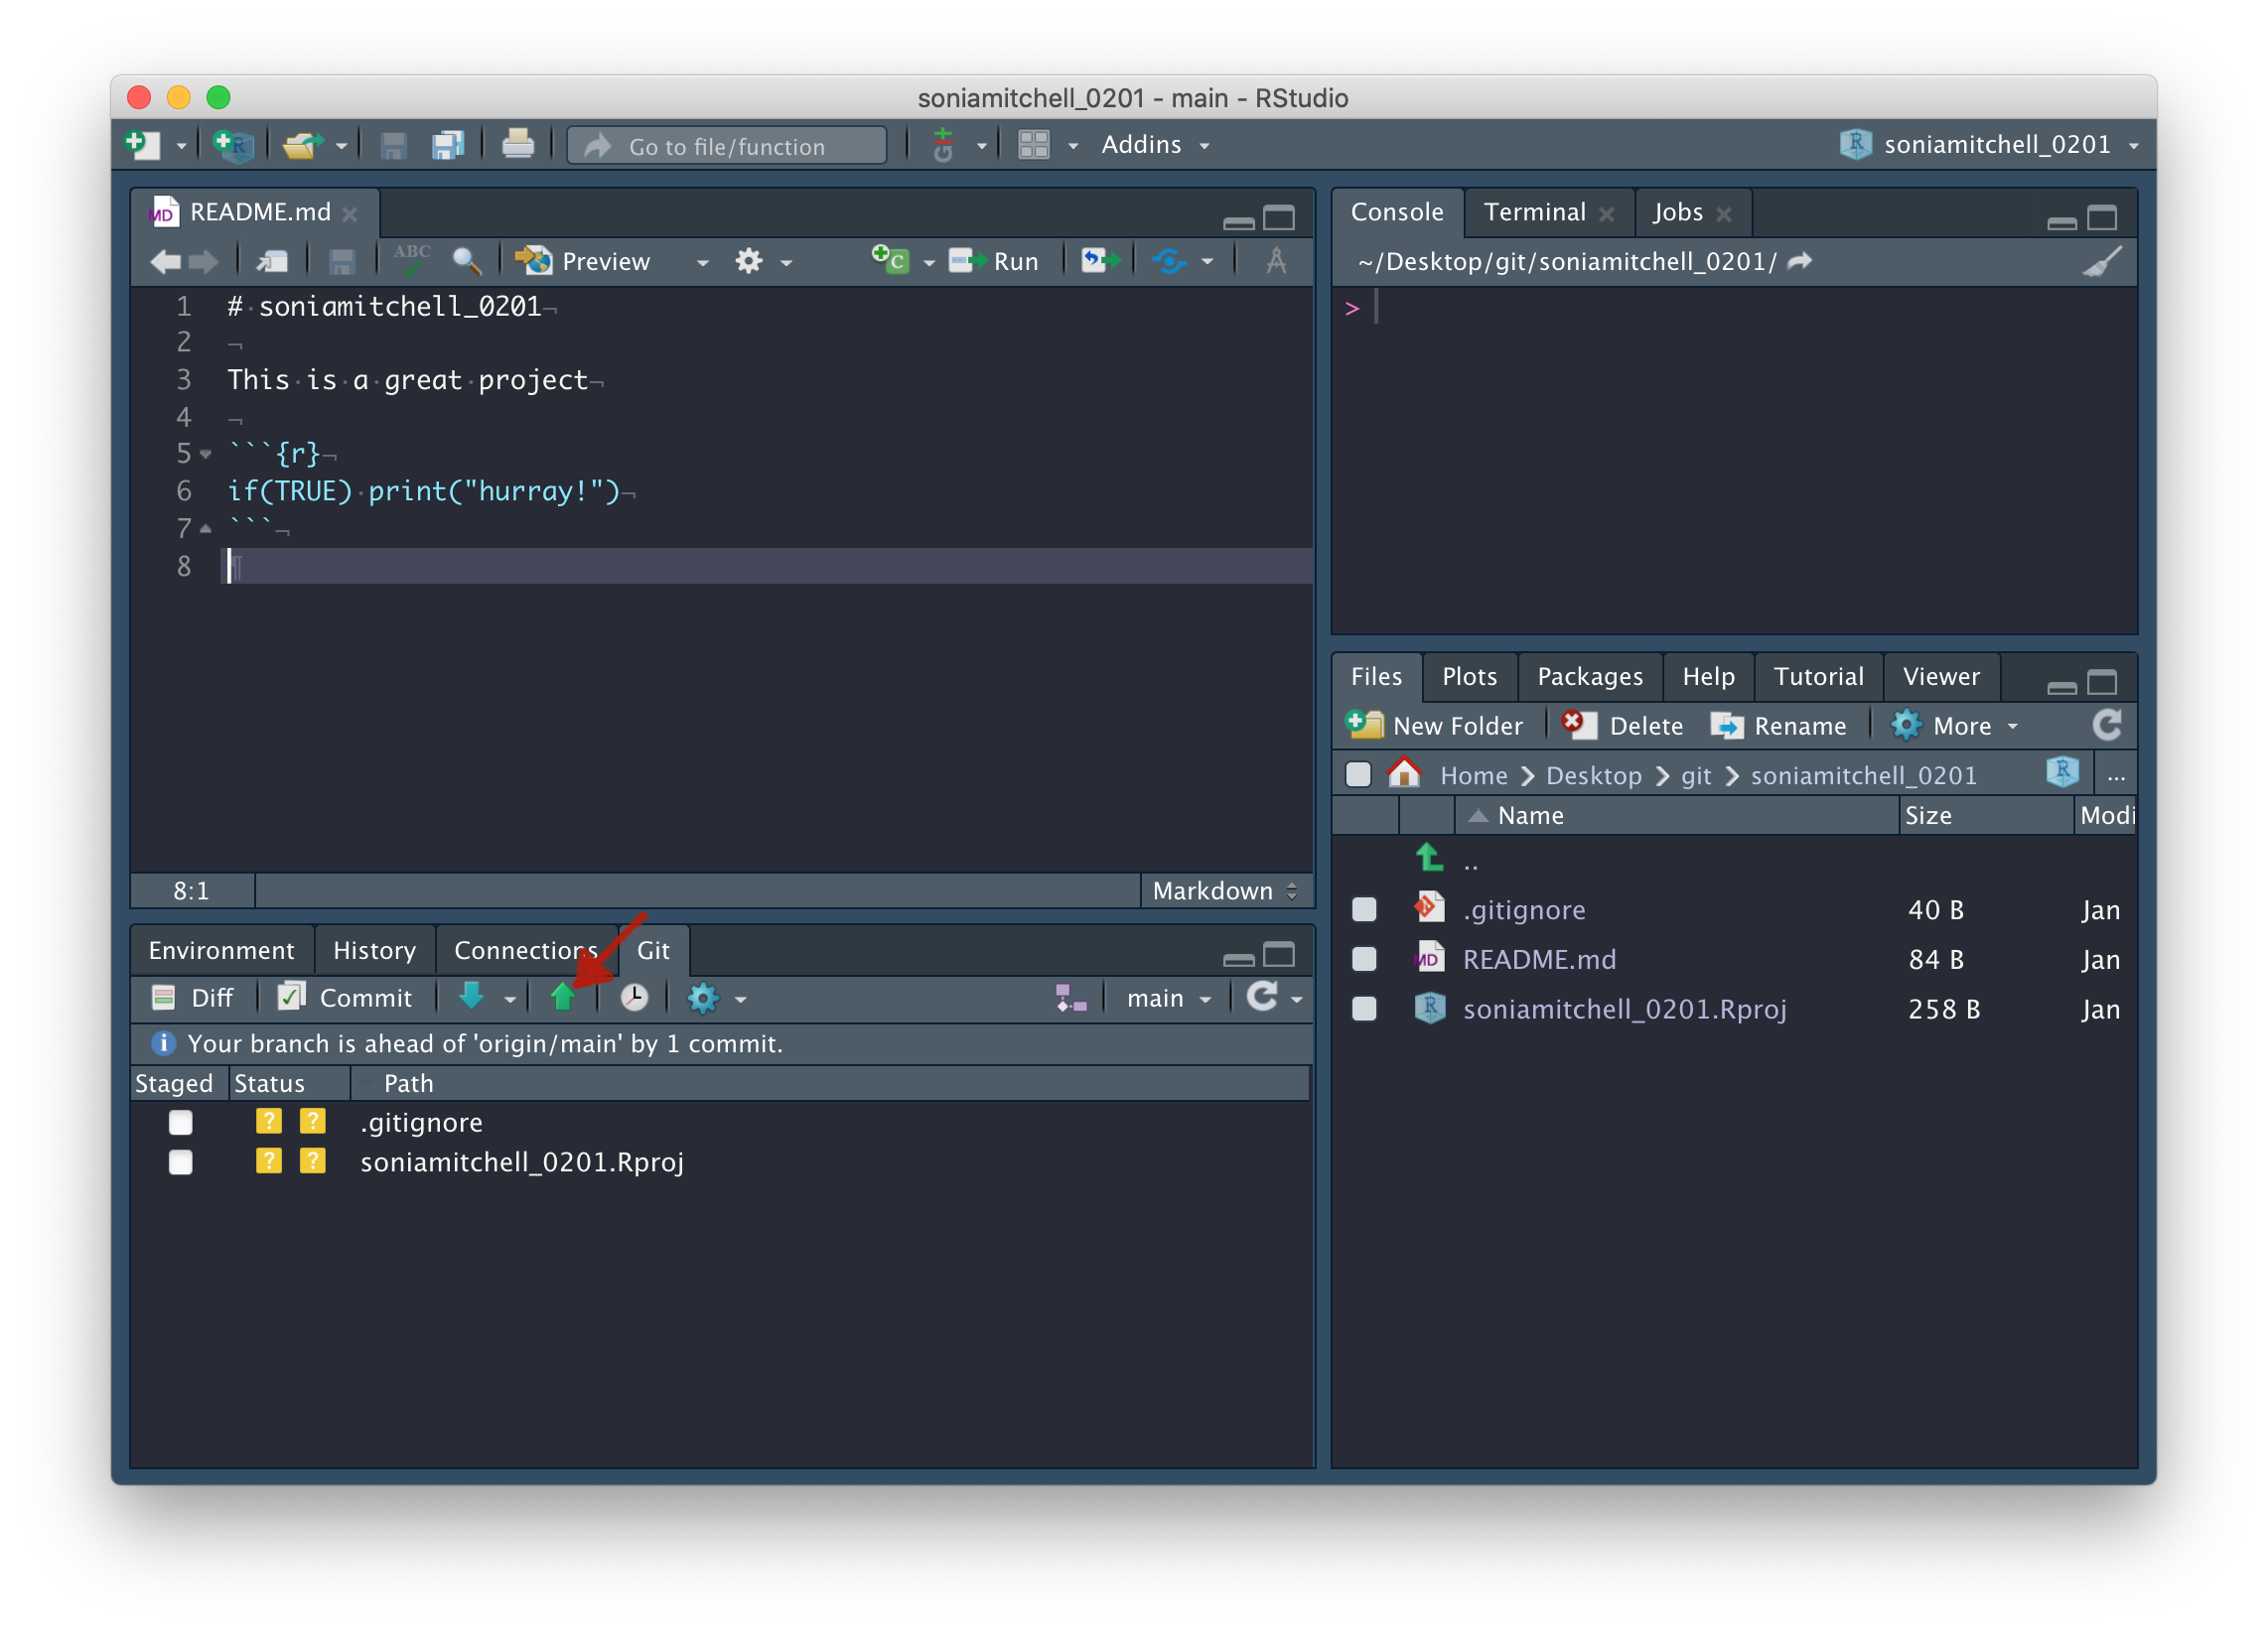
Notice that README.md has disappeared from the Git tab? That’s because it’s packaged up
(staged) and ready to be shipped out (pushed) to GitHub. Click on the
green Push arrow, to push all
staged files (at the moment, just README.md) to GitHub.
Enter your password if you’re asked for it.
Congratulations again! You’ve successfully pushed these changes to GitHub. Go take a look at your GitHub repository and you’ll see that the GitHub README has been updated.